Musing with Max

Musing with Max

January 30, 2012

New Orleans Monday...on a Sunday

A few years ago Frank and I went to New Orleans during the first weekend of Mardi Gras. We didn't necessarily mean to, we had just decided sometime in November of the year before that we wanted to go to New Orleans for a long weekend and we chose a long weekend in February. A couple of reasons probably had something to do with this; we'd be real tired of Winter by then and needed an escape, New Orleans' weather in February is a lot more pleasant than say August, and February is Frank's birthday (the 1st if anybody's interested) and this would be part of his present and celebration. And boy what a celebration! We arrived on a Thursday evening and after dropping our stuff off at our hotel we went in search of food and since our hotel was only half a block from Bourbon Street that's where we headed. Quite the jolt that was, it was pure mayhem. People everywhere, loud, drunk people; all  carrying giant cups of liquor and dumping them wherever they were standing when they gulped them down. Walking through these masses while kicking garbage out of the way in search of a place that wasn't busting at the seams with people to have some famed New Orleans food was a tad intimidating to say the least. We finally settled on a place right in the middle of the action and were greeted by a waitress that kept calling me gorgeous and Frank sweetie- we had burgers and then ran back to our hotel wondering what in Hell we'd gotten ourselves into. The initial shock wore off quickly the next morning when we ventured out to find a gloriously sunny day with streets gleaming and shining from the glare of the sunlight bouncing of the wet pavement, no garbage in sight. Apparently they bulldoze it away and wash the streets down at dawn before the cycle starts again somewhere near noon. That first morning we walked over to Royal street and peeked into a hidden courtyard with a charming coffee shop where Frank found his beloved morning buns which he had to have every morning. We got used to the craziness pretty quickly, did exploring during the day, learned how to walk around with "Go Cups" at night, got real excited when I got asked for ID everywhere I went, Frank even showed up after a stroll one evening wearing a whole bunch of beads that had been tossed at him from a balcony; somebody actually called him Elvis! (how drunk are these people?) We ate delicious food, chased after a chow chow who belonged to our tour guide in the Garden District when he decided to take off, watched a few parades and fought for beads... Then came Sunday and enough is enough. All this partying and debauchery can wear you down. But there is one New Orleans tradition which I had to do. It is tradition in New Orleans to have red beans and rice for dinner on Mondays, something to do with getting leftovers from all the weekend cooking and throwing them into a pot with red beans which pretty much cooks itself, I think. Unfortunately we were leaving on Monday morning but that wasn't going to stop me from having it. So we walked over to The Gumbo Shop, sat in their quaint courtyard, tried not to think about somebody yelling Stella!!!, and ate Monday red beans and rice, on Sunday. And since I'm not going to be in New Orleans any Monday (or Sunday) soon here is my version.

New Orleans Monday red beans...on Sunday.

1 16 oz. package of dried red kidney beans
1 ham hock
1 medium onion chopped coarsely
1 green bell pepper chopped coarsely
2-3 garlic cloves, minced
2 tbsp tomato paste
1 dried Spanish chorizo (I use Palacio) cut in chunks, about 6 ozs.
olive oil
salt to taste
pepper to taste
cumin to taste

In a stockpot soak beans overnight in 4 to 6 cups of water
add a pinch of salt and cumin, about 2 tspns, and bring to a boil. Lower heat, cover and let simmer for 45 minutes to one hour.
While beans are simmering, heat one tbsp of olive oil in a small skillet at high heat and sear the ham hock on all sides, add to the beans.
Add additional olive oil to the skillet, lower the heat to medium and sautee the onions, peppers and garlic for about ten minutes.
Season lightly with salt, pepper and cumin.
Add the tomato paste and stir into the onion mix. Add contents of skillet to the beans.
After 45 minutes, remove the ham hock to a cutting board and shred the pieces of ham off of the bone.

return the meat to the bean pot and add the chorizo pieces. The bone can go back in also to add flavoring. Simmer for an additional 30 minutes or so. Taste for seasoning and adjust.

Serve over steamed white rice
put on some beads and this movie

and you're there.

Right Max?
the heck with beads, where's my Go Cup?

January 29, 2012

Saturday

Saturday has always been my favorite day of the week-I'm sure I'm not alone on that one-it's the beginning of the weekend and the energy level is through the roof so its wake up  walk Maxy

run a million errands get back home do some relaxing listen to music drink a little wine cook a nice meal drink a little wine sit down to a nice long meal listen to music drink a little wine eat some good food have a conversation listen to music drink a little wine walk Maxy wash dishes watch some rented movie from Netflix drink a little wine fall asleep. Perfect. Its a little different for me now, since I'm not working I guess every day could be Saturday--but its not, which is fine because that way I get to do all of the above with the same enthusiasm. Now this being the end of January the usual is pretty much to spend as much time in the kitchen as possible once all the running around has been done, winter and all. Even if this winter seems to have gone missing this was Saturday.

French Bread adapted from Steamy Kitchen

4 cups bread flour
(I used a combination of flours, bread, unbleached and wheat)
2 teaspoon active quick rising dry yeast
2 teaspoon salt
1 1/2 cups warm water

1. Put 1/4 cup of bread flour on your clean counter top and reserve. Place remaining 3 3/4 cups bread flour in your mixer bowl. Spoon the yeast on one side of the bowl, and the salt on the other side. Pour in the warm water and with your regular mixer paddle, mix on low speed until the dough comes together in a mass. Switch to the dough hook. Mix on medium speed for 2 minutes. Dough should clear the sides but stick to the bottom. If it is too sticky, add 1 tablespoon of flour at a time. If too dry, add 1 tablespoon of water to dough to adjust.
2. Turn the mixer on again and mix for 3 minutes. Take the dough out and place on the counter. Remember that 1/4 cup of flour that we reserved? We’ll use it now. As you knead the dough by hand, incorporate more flour as you need.
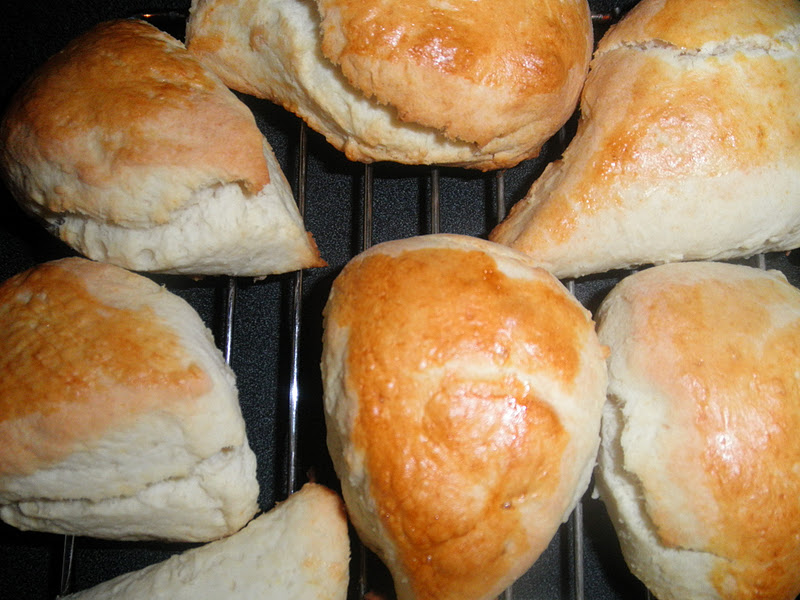
Knead by hand until the dough is very satiny, smooth, tight and formed into a nice, compact ball:
Let the dough rest for 5 minutes.
Place this dough in a large lightly oiled bowl (I use Pam spray). Turn dough over so that all sides have a thin coating of oil. Cover with plastic wrap and set in warm place for 1 1/2 hours to let rest and rise. Dough should almost double in size. While the dough is rising, about 1 hour into the rising stage, preheat your oven to 450F and place your pizza stone, inverted baking sheet or covered cast iron pot into the oven to heat up.
4. After the dough has risen fully, punch dough down and form back into a ball. Poke your finger on the surface – the dough should give into the pressure and slowly creep back up.
5. Cut the dough into half – you’ll shape one half at a time (keep the other piece under wraps) Pick up the dough – stretch it out until it forms a big rectangle. Dust your work surface with flour and fold over the ends of the dough
Now do a little “karate chop” lengthwise down the middle of the bread and stretch out the long ends again. Fold over in half. The karate chop helps get the middle tucked inside. Pinch all sides shut. This is important – you want to make sure that all ends including the short ends are pinched tightly to create a seal. This allows the bread to rise & expand up and out evenly.
6. Turn the bread over so that it is seam side down. Cover the loaf with a damp kitchen towel. Repeat with the other dough ball. Leave the loaves to rest on your well-floured pizza peel or cutting board for 30 minutes. After resting, take a sharp paring knife and make 3-4 shallow, diagonal slashes on the surface of the loaf. This allows the steam in the bread to escape so that it expands evenly during the baking process.
7. When you are ready to bake, remove your baking vessel from oven. Carefully slide the gorgeous loaf into or onto your baking vessel.
If you are using pizza stone or inverted baking sheet: You can probably fit both loaves on it at the same time if you wish. -> Get a 1/2 cup of water ready next to the stove. Open the stove, put your bread in the oven and throw the water on the oven floor. Immediately close the oven door. This creates your steam. -> Bake 20-25 minutes. Check temperature of the bread – internal should be 190-210F. Remove and let cool before cutting into it.
If you are using a long cast-iron pot or covered baker: -> Before closing the lid on your pot/baker, put 1/4 cup of water directly in the pot. Cover immediately. Put pot in oven. -> Bake 10 minutes. Remove lid of pot. Bake another 14 minutes. Check temperature of the bread – internal should be 190-210F. Remove and let cool before cutting into it. Repeat with other loaf. (For convection ovens- bake 8 min covered, 10-12 min uncovered. Check temperature of bread) To re-crisp the crust, put in 375F oven for 5 minutes.
(I used a pizza stone)

Slow Cooked Duck with Olives adapted from Paula Wolfert

1 duckling (5 to 6 pounds) fresh, or thawed*
2 medium onions, coarsely chopped
2 ribs celery, sliced
4 cloves garlic, halved
1 TBS fresh thyme, chopped
1/4 cup flat-leaf parsley, chopped
2 bay leaves
2 tsp sea salt
1 tsp pepper, freshly ground
1 tsp herbes de Provence*

Preheat oven to 475 degrees. Halve the duckling, setting aside the back, neck, and wing tips for sauce. In a large roasting pan, make a bed of onions, celery, garlic, thyme, parsley, and bay leaves. With the tines of a fork, prick the duck skin every 1/2 inch. Rub the duck with salt, pepper, and herbes de Provence and set it on top of the vegetables, skin side up. Roast, uncovered, for 10 minutes.
Reduce the oven temperature to 275 degrees. Tightly cover the pan with foil, and return duck to oven for 3 1/2 hours. After 3 1/2 hours, turn off the heat, leaving the duck in the oven to cool for 30 minutes.
Carefully transfer the duck to a large cutting board. Remove and discard loose bones and chopped vegetables. Reserve 1 tsp of duck fat for finishing duck. Quarter the duck, and prior to serving, preheat the broiler and set rack about 10 inches from heat. Place duck quarters on roasting pan. Dab the duck skin with the tsp of duck fat, and run under the broiler to crisp the skin. Serve with sauce on side. 4 servings.

Green Olive Sauce

Neck, back, and wing tips of duck
1 medium onion, sliced
1 TBS tomato paste
1/2 cup dry white wine
Pinch of sugar
1 cup chicken stock
3 cups water
1 cup green olives, rinsed and pitted

Slowly brown duck neck, back, and wing tips in their own fat in a large covered, nonstick skillet.

 Add onion and continue cooking until the onion slices are glazed and browned, about 10 minutes. Pour off any excess fat.
Add tomato paste to the skillet, and cook until lightly charred. Quickly deglaze pan with white wine. Add sugar, stock, and water. Bring to a boil, reduce heat, and simmer for one hour. Strain, degrease, and boil until reduced to one cup.
Reserve, covered, in refrigerator. Just before serving, reheat the sauce, add the olives, and simmer for 10 minutes. Season to taste.
Serve with brown rice

and what were some of our errands?

A new bed for Max

because he's worn out his old one

and that makes him happy

We've had quite the day which makes us a bit exhausted

January 26, 2012

Tea Party

Madonna is everywhere lately; apparently she’s directed a movie, because she’s a director now, and is doing the publicity junket all over the place. So the other day when a clip of a recent interview she gave was being played online I clicked on it just to see what snippets of wisdom she might throw our way. Beyond her usual self importance and complete lack of a sense of humor there were a couple of things that peaked my interest. One was her bizarre dress, it had some beady pearly things going from her shoulders and down the sleeves which seemed a bit overdone for a sit down in the middle of the morning or afternoon. Then there was the room's decor, it was so formal over the top British hoity toity which doesn't seem to go with her at all (as if I would know), maybe that explains the dress-formality is the order of the day. And finally there was the on and off very clipped very odd British accent. This got me thinking, in her quest to embrace and take over all things British does she follow that very British of traditions "afternoon tea"? Which of course got me thinking of scones; yes it always goes back to food somehow. Scones are tricky little things, they should be light and fluffy and delicate which isn't always an easy accomplishment. I remember every once in a while at work ordering a scone from the nearby deli for breakfast only to be real disappointed when this giant weighty triangle appeared; it was more paperweight or hockey puck than scone but I begrudgingly ate it anyway and usually I skipped lunch that day, the weight of it just sat in my stomach. I did come across this lovely recipe which I've made a couple of times but I wanted something a little more traditional.


English Scones with Devonshire Cream adapted from Vanilla and Lace


English Scones
Makes 16
4 cups Flour
3 tablespoons Sugar
4 teaspoons Baking powder
1/2 teaspoon Cream of Tartar
1/2 teaspoon Salt
1 1/2 cups Half and half
1 1/2 sticks of butter - chilled
1 large egg yolk (save white for brushing)


Preheat oven to 425 degrees.
Whisk together flour, sugar, baking powder, salt and cream of tartar. Cut in butter, until combined and resembles a course meal. (the butter lumps should not be pea sized)
Add egg yolk to half and half. Stir half and half mixture into dry ingredients. Knead slightly in the bowl to combine. Divide dough in half. Form each half into a round, slightly dome shape about 1 inch thick. Cut the round into 8 wedges. Brush tops with egg white. Place the wedges on an ungreased baking sheet. Bake for 18-20 minutes. Tops will be golden brown.


Perfect little puffy pillows

If you need to store them, wrap individual baked scones in aluminum and store in the freezer. Rewarm in a 425f oven for about 20 minutes when ready to eat. They will feel and taste freshly baked. Do this if you are not going to eat them within a day lest they become the aforementioned hockey pucks.

Devonshire cream

1 cup Whipping cream
2 tablespoons Powdered sugar
1/2 cup Sour cream


Whip the cream until soft peaks form. Stir in powdered sugar and sour cream.

Serve with jam or as I did, lemon curd.
and coffee since I'm not much of a tea drinker
We feel so very civilized and proper. Don't we Max?
Hmm, I do believe you could pass for a Pointer.

Oh, and for my friends who saw this title and thought I had gone off my noggin, do not fret I am still the same old bleeding heart opinionated liberal you so love.

January 23, 2012

A flower in the house

January is usually pretty paltry around here in the flower department. I try to keep the poinsettias going as long as possible and hopefully make them last in bloom until the blooms start to appear outside and I can pick them to bring indoors. This year I only have one poinsettia but I so wanted to join the party, especially on such a special day, that I decided to enhance it...just a little.

original
color saturated

impressionist

pop art luminance
swirl

Happy Anniversary Jane!

January 22, 2012

Flour power

Lest anyone say that I don't keep my New Year's resolutions this week I threw myself into baking bread. I have baked bread before and have mostly used recipes from all kinds of sources, assorted cookbooks, magazines, websites, newspapers, pretty much wherever I found a recipe I wanted to try. However, since I decided that I was going to bake more bread than the occasional loaf here and there I thought it high time I got myself a bread baking cookbook. First came the unenviable task of figuring out which one, and there are lots of them. So I spent waaaayyyy too much time on Amazon researching this subject I finally decided on this book
which got a tremendous amount of good write ups from regular people like me. There was another book which I found very interesting that received very good write ups also but most of them were from professional bread bakers which spooked me a little; this might be too lofty for a non-pro like myself and why are professional bread bakers buying a book? Shouldn't they know how to do this by now? Anyway, my book was originally written in 1970 by a Zen monk (if that's the right term) who for many years was a cook, baker, dishwasher, etc. at the Zen Center of San Francisco in the Tassajara Mountains, and has been revised several times throughout the years by its author. This gave it two big pluses as far as I'm concerned: 1. Monks are great bread bakers, they're isolated, patient, have a lot of time and love to work with their hands and of the earth; they perfect their craft. 2. San Francisco bakers make the best bread in this country, sorry Amy's Bread. Once my book arrived and I went out and bought tremendous amounts of flours, yes flourS with an s at the end, and chose my first loaf, a French sourdough which requires that one make a sourdough starter, something I have never done before and have resisted since it takes a few days to proof and I'm not really known for having the patience of a monk, but since I decided on this I may as well go for it.

Sourdough starter adapted from The Tassajara Bread Book

Combine 1 tablespoon of dry yeast, 2 1/2 cups of warm water, 2 teaspoons of sugar or honey, and 2 1/2 cups of flour (I used, unbleached all-purpose). Cover and let it ferment for five days, stirring daily. The starter will keep indefinitely in the refrigerator once it's proofed.

Country French Bread adapted from The Tassajara Bread Book
(makes 2 moderate loaves)

the night before:
1 1/2 cups of sourdough starter
5 cups of whole wheat flour
3 1/2 cups warm water

At night, add the starter to the flour, then mix in the water a little at a time until it is all added. Beat well. Cover and set aside overnight. A warm, not hot, place is preferable but not essential.
in the morning:
Replenish the starter
1 teaspoon dry yeast
1/4 cup pf water
1 tablespoon of salt
4 to 6 cups unbleached white flour

In the morning, replenish the starter and refrigerate it for the next batch of sourdough bread. Dissolve the yeast in the water and let it sit for 5 minutes. Then stir it into the sponge along with the salt. Fold in the white flour a cup at a time until a dough forms. Remove from the bowl to a floured board and knead thoroughly, adding more flour as necessary.
Divide the dough into two pieces, shape each piece into a ball, and place on an oiled baking sheet. Let the loaves rise until doubled in bulk, 1 1/2 to 2 hours.

Make a few slits in the tops, brush or spritz them with water
place the loaves in a 425F oven for 20 minutes. Brush the tops with water again, turn the oven down to 375F, and continue baking for 50 to 60 minutes or until browned.

not bad if I say so myself
but let's ask the expert

because there's nothing Max loves more than bread

...or napping

...or Frank

...or napping on Frank

What bread?

January 17, 2012

Oh right...it's January

This time last year we looked like this
and were headed for this

and that pretty much defined our entire winter: snow, cold, ice, snow, snow and more snow.
Yes I know, real pretty but perfectly annoying after about 5 minutes. But this year it's been the complete opposite; it's been downright balmy. Temperatures hovering somewhere in the 45 to 50F range and not a flake in sight...well except for the ones on two legs, purumpum! (Sorry, couldn't resist). So we've been innocently going along reveling in our good fortune, that is until last Thursday when the temperatures plummeted to 10F with a fierce wind. Out came the big coats, scarfs, hats, mittens, etc. I even tried to put this on Max
which didn't work out very well and I was greeted by this

but after much complaining we realized...hey, its January! this is normal. And what's going to make us feel better? why something stewy of course! and French!

Beef Bourguignon adapted from Bon Appetit.

Serves 8

  • 8 ounces bacon, coarsely chopped
  • 3 pounds well-trimmed boneless beef chuck, cut into 1 1/2-inch cubes (from 7-bone chuck roast)
  • 1/3 cup all purpose flour
  • 1 1/4 pounds boiling onions, peeled
  • 3/4 pound large carrots, cut into 1-inch pieces
  • 12 large garlic cloves, peeled (left whole)

  • 3 cups canned beef broth
  • 1/2 cup Cognac or brandy
  • 2 750-ml bottles red Burgundy wine
  • 1 1/4 pounds mushrooms
  • 1/3 cup chopped fresh thyme or 2 tablespoons dried
  • 1 tablespoon dark brown sugar
  • 1 tablespoon tomato paste

Preheat oven to 325°F. Sauté bacon in heavy large Dutch oven over high heat until brown and crisp, about 8 minutes. Using slotted spoon, transfer bacon to paper towels. Season beef generously with salt and pepper; coat with 1/3 cup flour, using all of flour. Working in 3 batches, brown beef in same pot over high heat, about 5 minutes per batch. Transfer meat to large bowl. Add onions and carrots to same pot and sauté until light brown, about 6 minutes. Add garlic and sauté 1 minute. Transfer vegetables to bowl with beef.

Add 1 cup broth and Cognac to pot; boil until reduced to glaze, scraping up browned bits, about 8 minutes. Return meat and vegetables and their juices to pot. Add wine, mushrooms, thyme, sugar, tomato paste and 2 cups broth. Bring to boil, stirring occasionally. Cover pot and place in oven. Cook until beef is tender, about 1 hour 20 minutes.
Ladle liquid from stew into large saucepan. Spoon off fat. Boil liquid until reduced to 2 3/4 cups, about 40 minutes. Season with salt and pepper. Pour liquid back over beef and vegetables. (Can be prepared 1 day ahead. Cover and chill.) Rewarm over low heat before serving.

apparently others had the same idea.

I think we'll survive the Winter.

January 11, 2012

Panino Panini

Spanish lesson for a Wednesday: Godfather-Padrino.
When Frank's godson was about 1 1/2
and yapping constantly in some language that only his sister could understand his parents made it a point to make sure that he called his godfather "padrino". Being 1 1/2 and not yet having mastered the art of talking the best he could do was "panino". Which of course brought my very obvious response of "Frank, you're a sandwich", and he still is. This to some extent is a compliment, Frank loves sandwiches and is quite skilled at making them so imagine how thrilled and excited he was when my brother and sister-in-law (OK my sister-in-law, my brother is usually clueless) gave us this for Christmas:
And away we went:

Grilled cheese panini

Provolone Cheese
tomato slices
cooked bacon slices
Tuscan bread
butter

Spanish Cold Cut panini

Serrano Ham thinly sliced
Lomo thinly sliced
cantimpalo chorizo thinly sliced
(from the Spanish cold cut packet from Trader Joe's)
cheddar cheese
dijon mustard
Tuscan bread
butter


Roast pork panini

Roast pork sliced
smoked Gouda cheese
gherkins sliced
Tuscan bread
Panini cubano-sort of

Roast pork, sliced
Serrano Ham, sliced
Provolone cheese, sliced (should be Swiss but we didn't have any)
gherkins sliced (should be regular pickles, but again didn't have)
Dijon mustard
butter
Tuscan Bread (should be Cuban, but ditto)
Max loves this panini thingy because there is a really good chance some cheese will come his way. And he can wait patiently as he is wont to do.